Check these three vital signs before you give up:
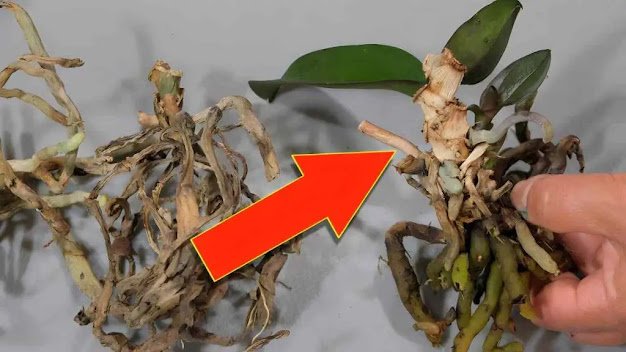
1️⃣ Roots: The Lifeline
✅ Alive: Roots are green or white, firm to the touch (they turn green after watering).
❌ Dead/Rotting: Brown, mushy, hollow—smells bad when pressed.
👉 Pro tip: Gently tug—if roots resist, they’re alive!
2️⃣ Pseudobulb (or Stem): The Energy Vault
✅ Alive: Firm, plump, not wrinkled or squishy.
❌ Dead: Shriveled, soft, or punctured easily.
For Phalaenopsis (common moth orchid), check the base near the roots.
3️⃣ Dormant Buds: Hidden Potential
Tiny green or brown nubs along the stem or at the base?
That’s a dormant growth node—it can sprout new leaves or a flower spike when conditions improve.
Even if you see nothing now… hope remains.
🛠️ How to Revive a Tired or "Dead" Orchid — Step-by-Step
Let’s bring your orchid back to life—one careful step at a time.
Step 1: Prune the Dead Parts
Use sterilized scissors or clippers.
Cut off:
Brown, mushy roots (cut back to healthy tissue)
Yellow or black leaves (if more than half damaged)
Dry, hollow flower spikes (unless there’s a green node)
👉 Leave anything green or firm—even if it looks weak.
Step 2: Repot in the Right Mix
Regular potting soil = death sentence.
👉 Use orchid-specific medium:
Chunks of bark
Sphagnum moss (lightly moist)
Perlite or charcoal (for drainage)
Choose a clear plastic pot with drainage holes—this lets you monitor root health.
Step 3: Adjust Watering (This Is Key!)
Most orchids die from too much water, not too little.
✅ Water only when dry:
Stick your finger in the pot—dry = time to water.
Or wait until roots turn silvery-gray (not green).
💧 How to water:
Soak the pot in room-temperature water for 5–10 minutes.
Let it drain completely—never let it sit in water.
👉 Frequency: Every 7–10 days (less in winter).
Step 4: Give It the Right Light
Orchids love bright, indirect light.
🚫 No direct sun—it burns leaves.
✅ Yes to an east-facing window or shaded south window.
💡 Low light sign: Dark green leaves (means it’s not photosynthesizing enough).
💡 Healthy sign: Light green leaves.
Step 5: Boost Humidity & Warmth
Orchids thrive in 60–80% humidity.
Easy ways to help:
Place the pot on a pebble tray with water (don’t let pot sit in water)
Group plants together
Mist lightly in the morning (not at night!)
Keep away from cold drafts and heaters
Ideal temp: 65–80°F (18–27°C)
Step 6: Feed Gently (After Recovery)
Wait 2–4 weeks after repotting before fertilizing.
Use balanced orchid fertilizer (20-20-20) at ¼ strength, once a month.
👉 “Weakly, weekly” is the golden rule.
🌸 When Will It Bloom Again?
With proper care, most revived orchids will rebloom in 3–9 months.
Look for:
A new flower spike (thin, green stem with a pointed tip)
Or a keiki (baby plant growing from the stem)
Patience is key.
Orchids live on their own schedule.
💡 Pro Tips for Long-Term Success
✅
Rotate the pot weekly
Even growth toward the light
✅
Label your care routine
Track watering & feeding
✅
Use cinnamon as antifungal
Dust cuts after pruning—it’s natural and effective!
✅
Clear pots = happy roots
You can see health and growth
✅
Celebrate small wins
One new root? Victory!
❤️ Final Thought: Beauty Needs Time—and Compassion
You don’t need rare skills or expensive gear to revive an orchid.
Sometimes, all it takes is:
A pair of clean scissors
A handful of bark
And the courage to say: “I’m not giving up on you.”
Because real care isn’t about perfection.
It’s about patience, observation, and second chances.
And when that first new leaf unfurls…
Or the long-awaited bloom finally opens…
You’ll know:
You didn’t just save a plant.
You gave life another try.